Last Minute Eclipse Photography
04 April 2024
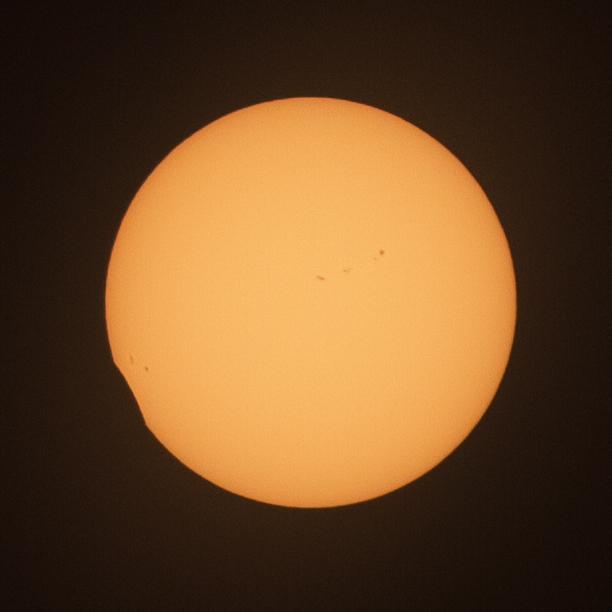
 August 21, 2017 Eclipse
Introduction
This (likely) typo-ridden guide is for casual eclipse photographers. It assumes you’ll be in the path of totality. It assumes you know how to shoot in manual mode and set up auto exposure bracketing on your camera and have some idea about what custom shooting modes on your mode dial are. If that’s not you, I’d definitely suggest passing on photography and just enjoy experiencing totality.
You can also check out my more comprehensive eclipse photography guide here. I’m making this quickly as I’m in the final stages of prepping a much more elaborate setup with tracking mounts, computer automation, and multiple cameras and focal lengths, but if I just had one camera and a solar filter, this is how I’d do it. Use it as a guide to prepare. You’ll need to figure some things out for yourself based on your camera, lens, etc. Practice, practice, practice.
First-timers
If this is your first time seeing a total solar eclipse, I’d give the same advice pretty much any other experienced eclipse viewer would give - just watch it, especially during totality. A few reasons for this:
- It’s nature’s most incredible sight.
- Totality is very short - that 2-4 minutes will go by faster than you can imagine.
- Totality is challenging to photograph well.
- There will be plenty of other people photographing it.
If you’re undeterred by the above admonition, then my next piece of advice is to limit your photography aims to ensure you take time during totality to enjoy it. Some suggestions:
- Practice what you’re going to do ahead of time.
- Limit how long you’ll mess with your camera. Set an alarm for yourself if need be.
- Be happy with not capturing everything.
With that out of the way, let’s get on with the guide.
Background info:
Eclipses are denoted by four main contact events that I’ll refernce throughout this guide:
- C1 (First Contact) - The lunar disk begins to cover the sun - the start of the partial phase.
- C2 (Second Contact) - The last bit of the photosphere (the bright part of the sun) disappears behind the moon. This is the start of totality.
- Maximum Totality - Not one of the four main contact events but a useful reference point. Halfway between C2 and C3 when you’re at the deepest part of the moon’s shadow. The sky will be its darkest at this point.
- C3 (Third Contact) - The photosphere reappears from behind the sun. End of totality, back to the partial phase.
- C4 (Fourth Contact) - The last bit of the lunar disk passes from the solar disk. The eclipse is over. Traffic jams abound.
Safety
There are a few important safety considerations to keep in mind with eclipses.
Solar Energy
This eclipse is high in the sky, so absent thin cloud cover, you’ll be dealing with the full-power sun. To photograph the uneclipsed and partial phases, you must have a proper solar filter on the front of your lens. This filter must cover the whole aperture of the lens and must be attached such that it won’t inadvertently fall off. This becomes more important as your lens focal length goes up. Failure to do this will result in melted or burned iris blades, shutter curtains, and sensors, as well as eyeballs if you try to look through an optical viewfinder. And speaking of optical viewfinders, don’t use them. Use live view as it’s not able to melt your retinas even if you point a giant unfiltered telephoto lens at the sun (don’t do that, because your camera will be toast, but at least you’ll still be able to see if you were using live view). Also, live view locks up your mirror which will eliminate mirror slap as a potential source of blur.
Do not use rear drop-in filters as the lens will concentrate the solar energy onto them which will quickly melt them. Do not look through an optical viewfinder or magnifying optic like binoculars or telescopes with solar glasses on. Also, I recommend against using regular ND filters (even stacked) as these may not block the IR and UV spectra that could damage your camera or lens.
Photographing the sun is done at your own risk, and you are ultimately responsible for the safety of your eyes and your equipment. Exposing any of them to the energy of the sun has inherent risk. I can only tell you to be careful; I am not responsible if you do something that destroys a lens or worse, damages your eyes.
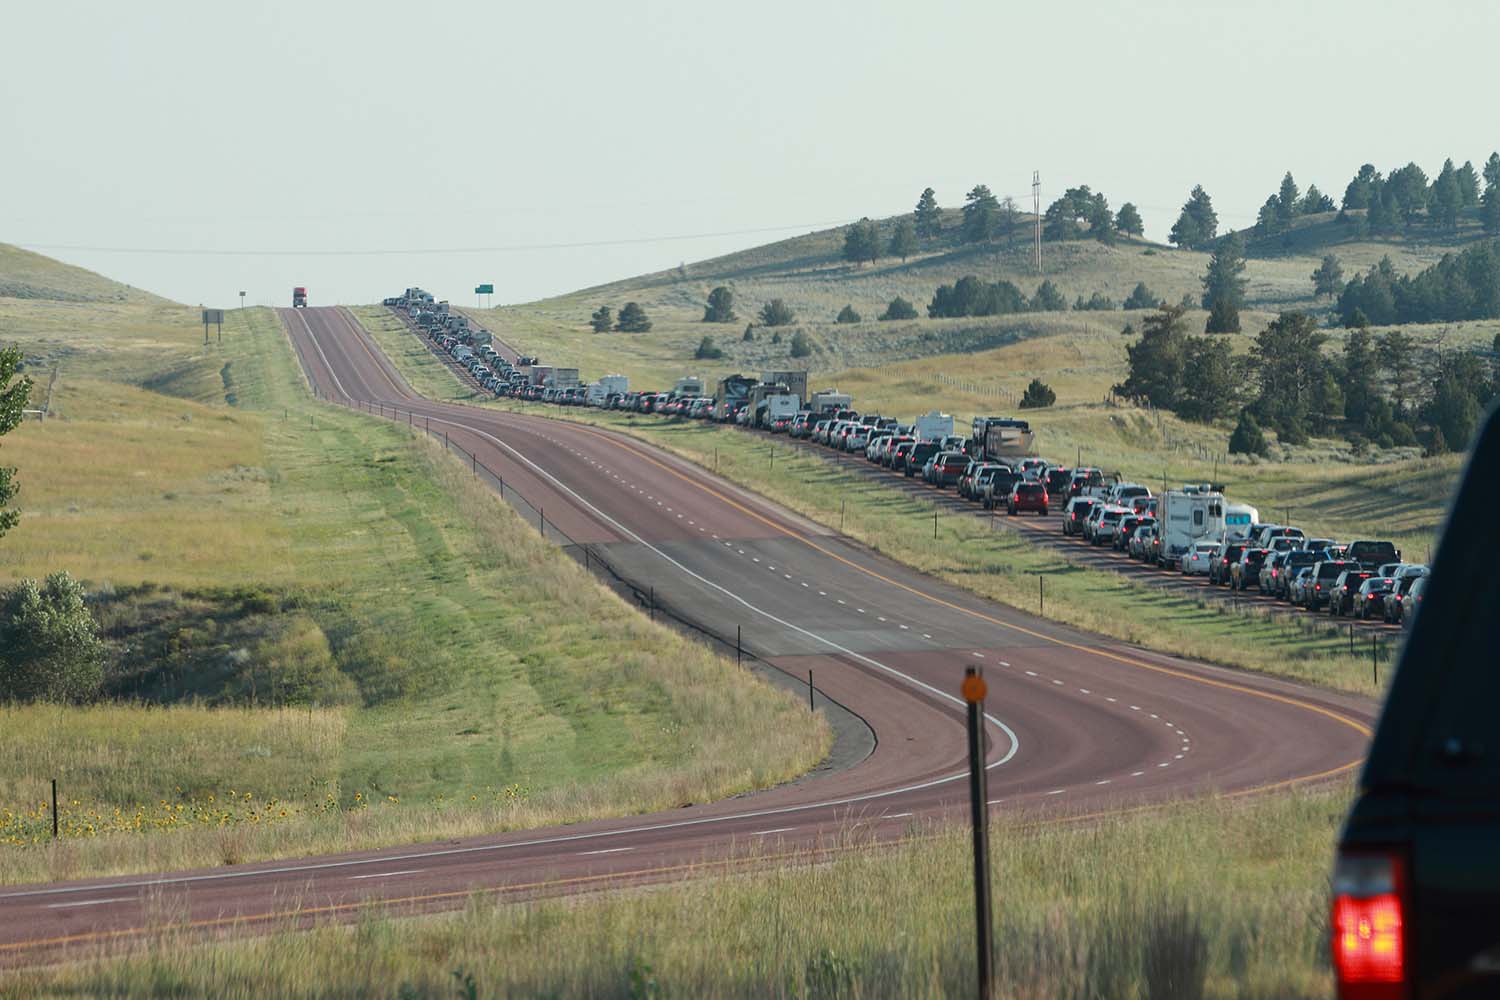
Traffic
The’ve been talking about it in the news, and they’re not exaggerating. Be ready for the worst traffic you’ve ever been in. Just be prepared - top off gas tanks, have plenty of snacks and water in the car, have a plan for using the restroom when there are no restrooms around, and find an extra does of patience and you’ll be fine.
Equipment
Some equpment you’ll want:
- Solar filter
- Your sturdiest tripod
- A gimbal head or something you can easily adjust pan/tilt with as you’ll be continually having to adjust to keep the sun in frame (this gets tedious with ball heads)
- A shutter cable
Filter
You’ll need to remove your filter just before the start of totality (C2) and put it back on just after the end of totality (C3). Figure out a way to do this quickly and easily. Slip-over filters are best for this. I recommend avoiding screw-on filters because they’re clumsy to use at these moments. If you can get some solar filter film, there are a variety of ways to fashion your own slip-over filter with a bit of foam/glue/tape/cardboard/etc. Just make sure it won’t blow off in the wind as that could make for a bad day.
Lens selection
The sun is small in the sky, but the corona is much larger. For partial phases you’ll want the longest focal length you have. For totality, anything in the 200mm - 700mm full-frame equivalent range will do. You might want to adjust zoom, remove a teleconverter, or switch lenses before totality.
Timing Assistance
Get a solar eclipse timer app. Things happen very quickly around totality and timing is critical. This app is a good one. It will announce the different phases and has a photography mode. The timings will be based off your location determined by your phone.
Preparation
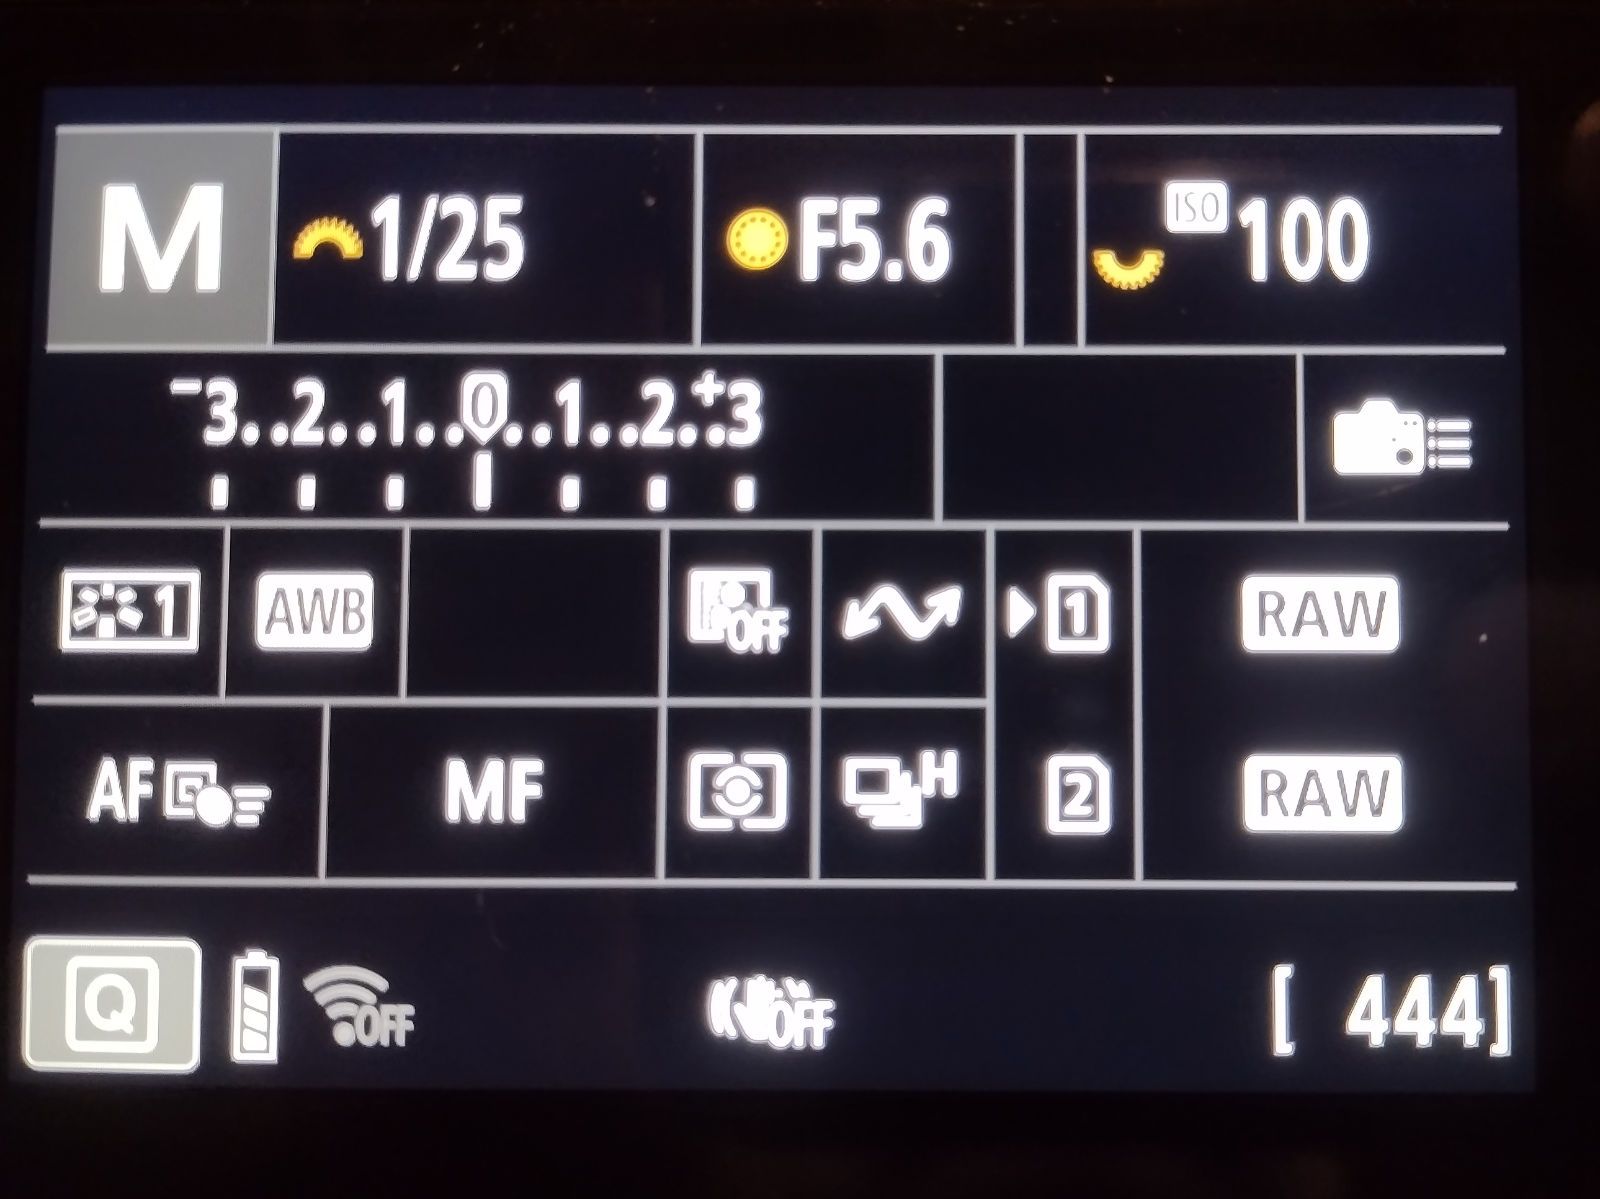
This guide is based on using custom shooting modes to help make things simpler during the fast-paced events of totality. These are the modes accessed from the mode dial that will recall some collection of pre-determined settings. First we’ll bring the camera to manual mode and establish some baselines. Set the image mode to RAW. Set the drive mode to continuous. It’s probably best to set the camera to your base ISO of 100 to use the sensor’s maximum dynamic range. Auto white balance is fine since we’ll be shooting RAW.
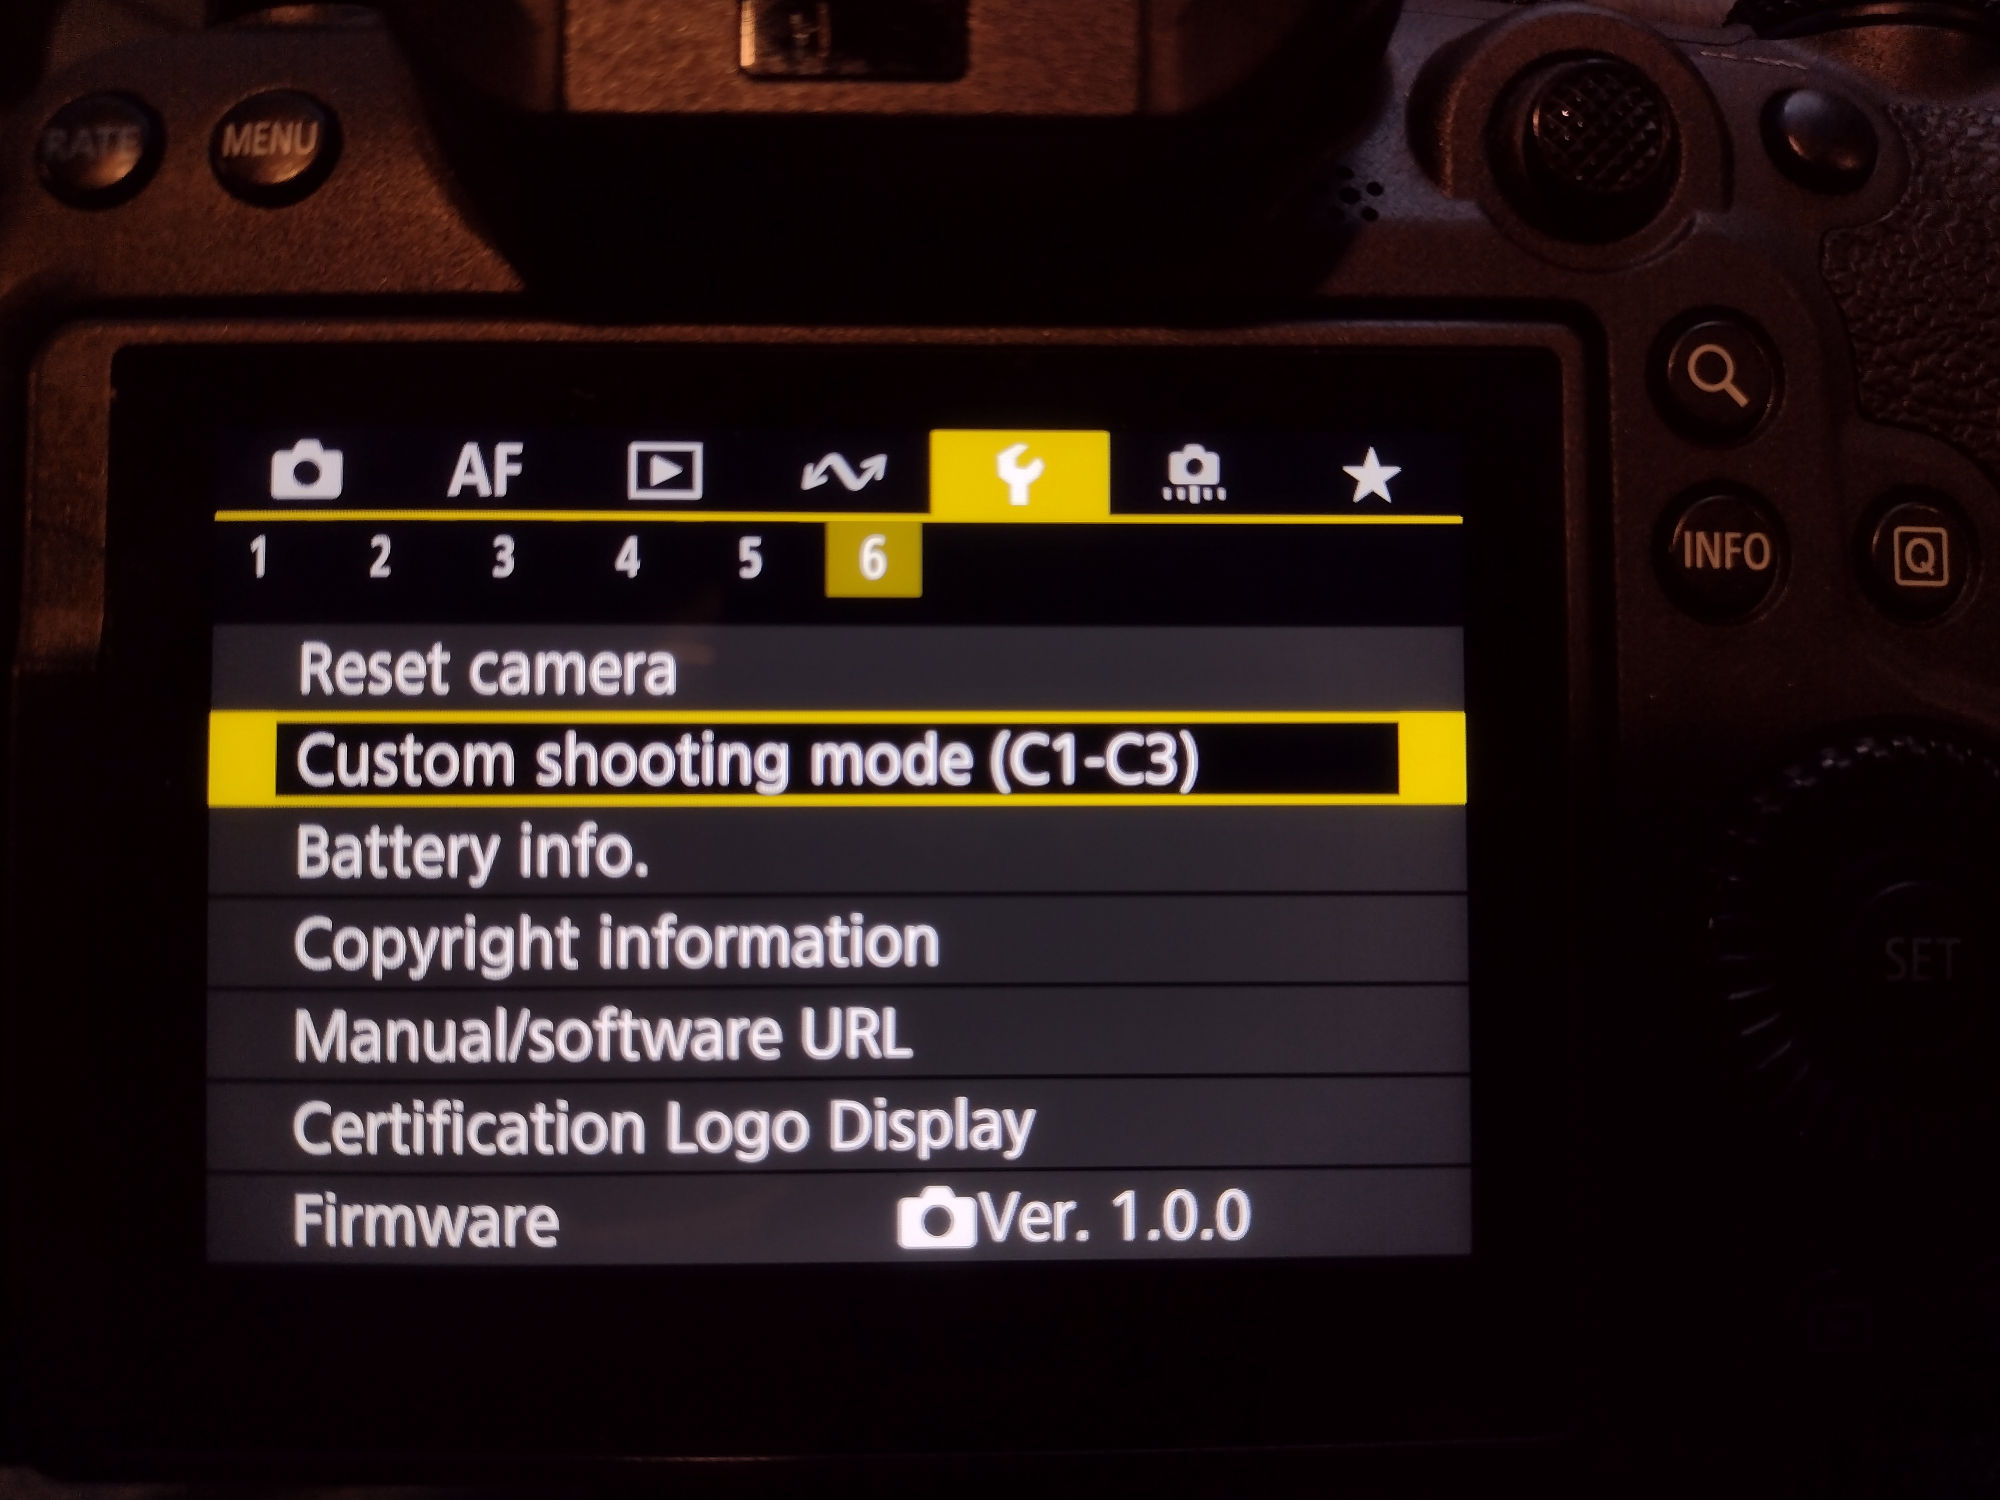
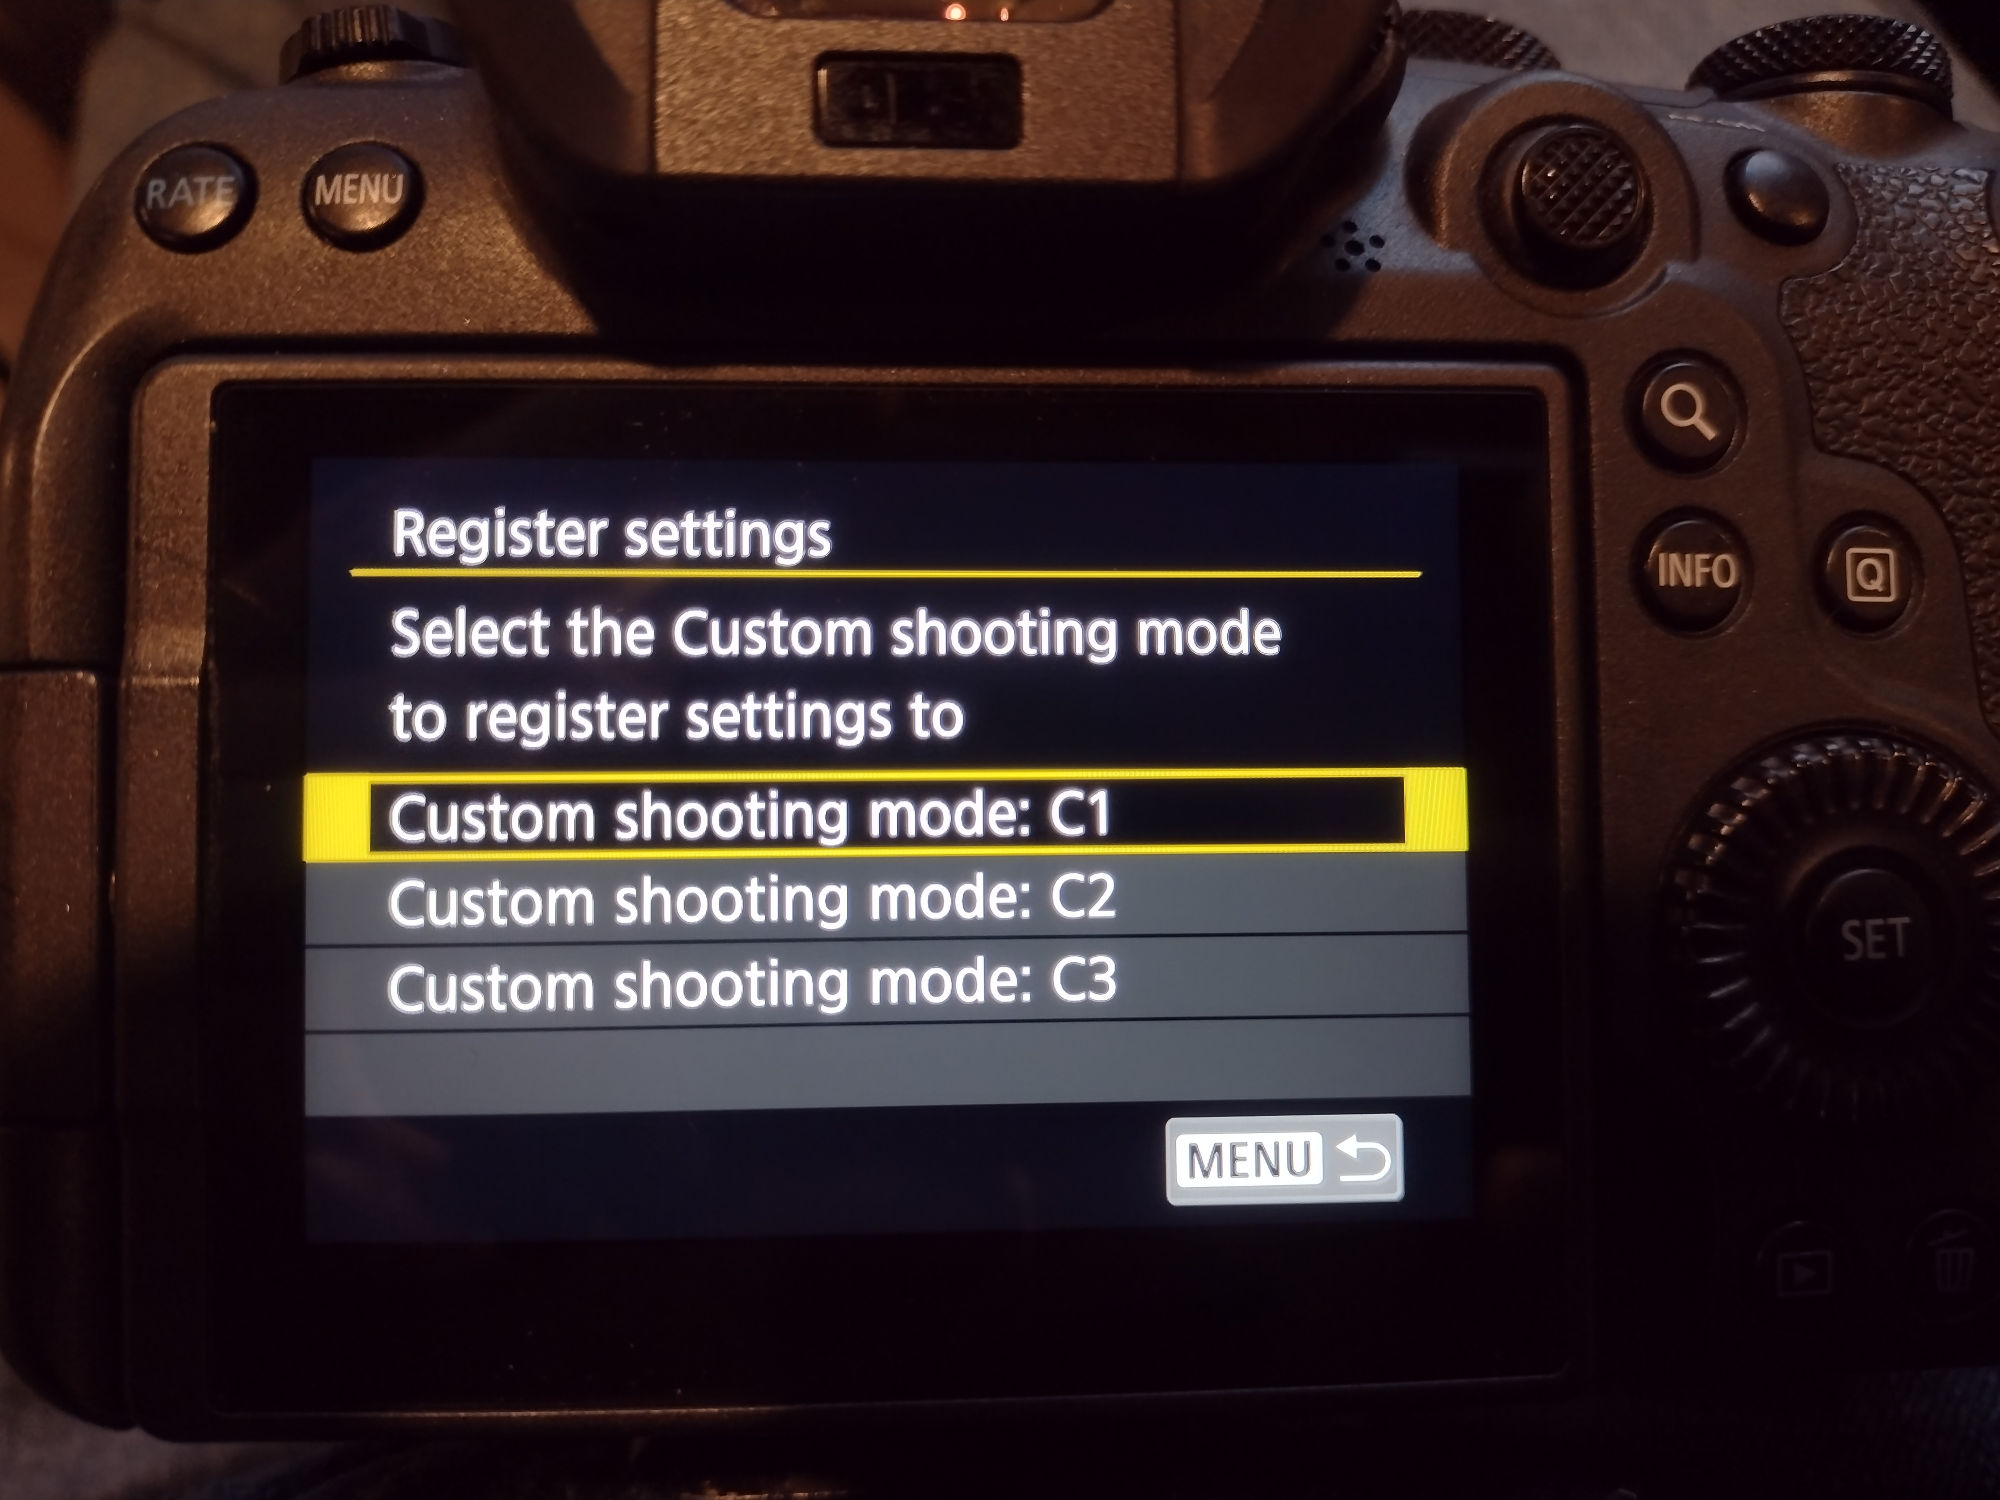
The approach for setting custom modes will depend on your camera. I’ll show some examples with a Canon R6ii which has 3 custom mode registers and I’ll use all three. If you have fewer modes, I’d prioritize the mode for the corona first, then the mode for the chromoshpere and prominences. On my R6ii camera, you use the following options in the camera menu to save the current camera settings to a custom mode. To set one, you simply set everything how you want it to be in the custom mode and then register that to one of the custom modes. Then when you switch to that mode, everything will change to the way you had it set when you registered the mode.

Each of the exposure settings I’m sharing here are based on suggestions on Xavier Jubier’s excellent webpage and a bit my own experience in 2017.
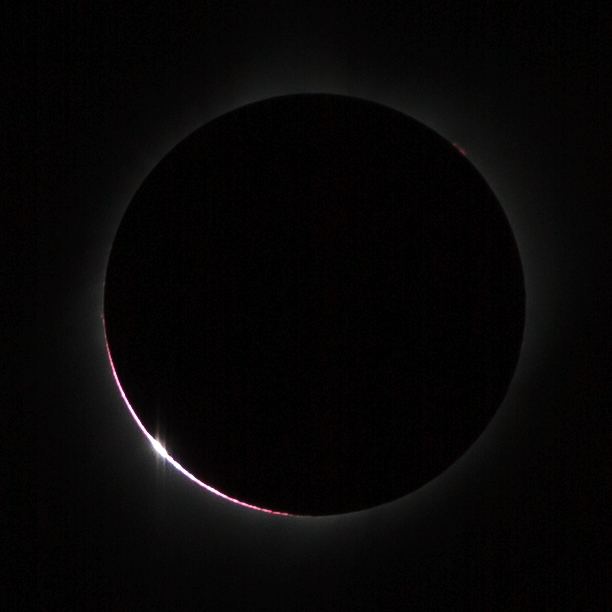
Custom Mode for Baily’s Beads
Baily’s Beads are the last little bits of light peeking through the valleys on the limb of hte moon. They change rapidly as you go into C2. They are shot without a filter in the 10-20 seconds before C2. At this point you shouldn’t look at the sun with your eyes, but enough of the sun is blocked that you won’t damage your camera by removing the filter.
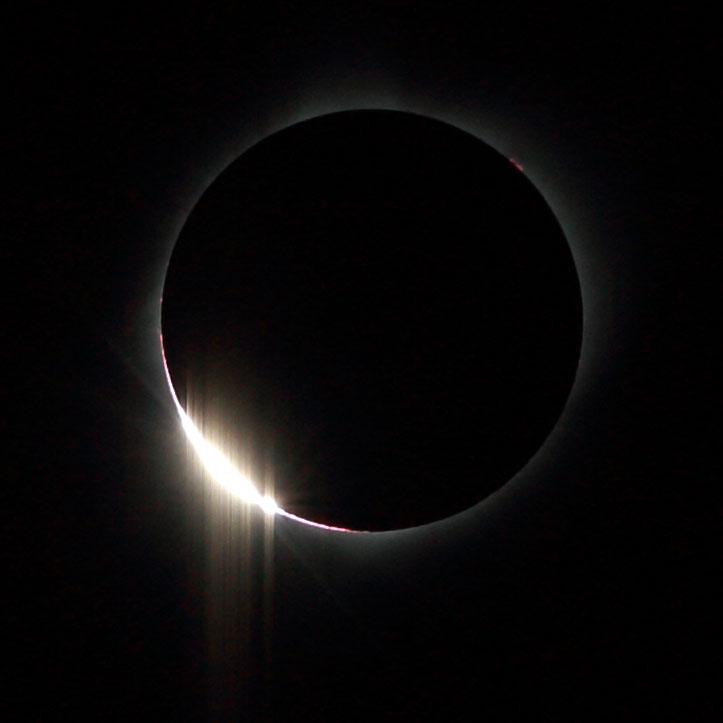
You’ll want to shoot them in a burst framerate that your camera can sustain for at least 30 seconds with a high, constant EV between 18 and 19 to capture their progression. You may stop down your lens some for this part. Here’s what I’d set.
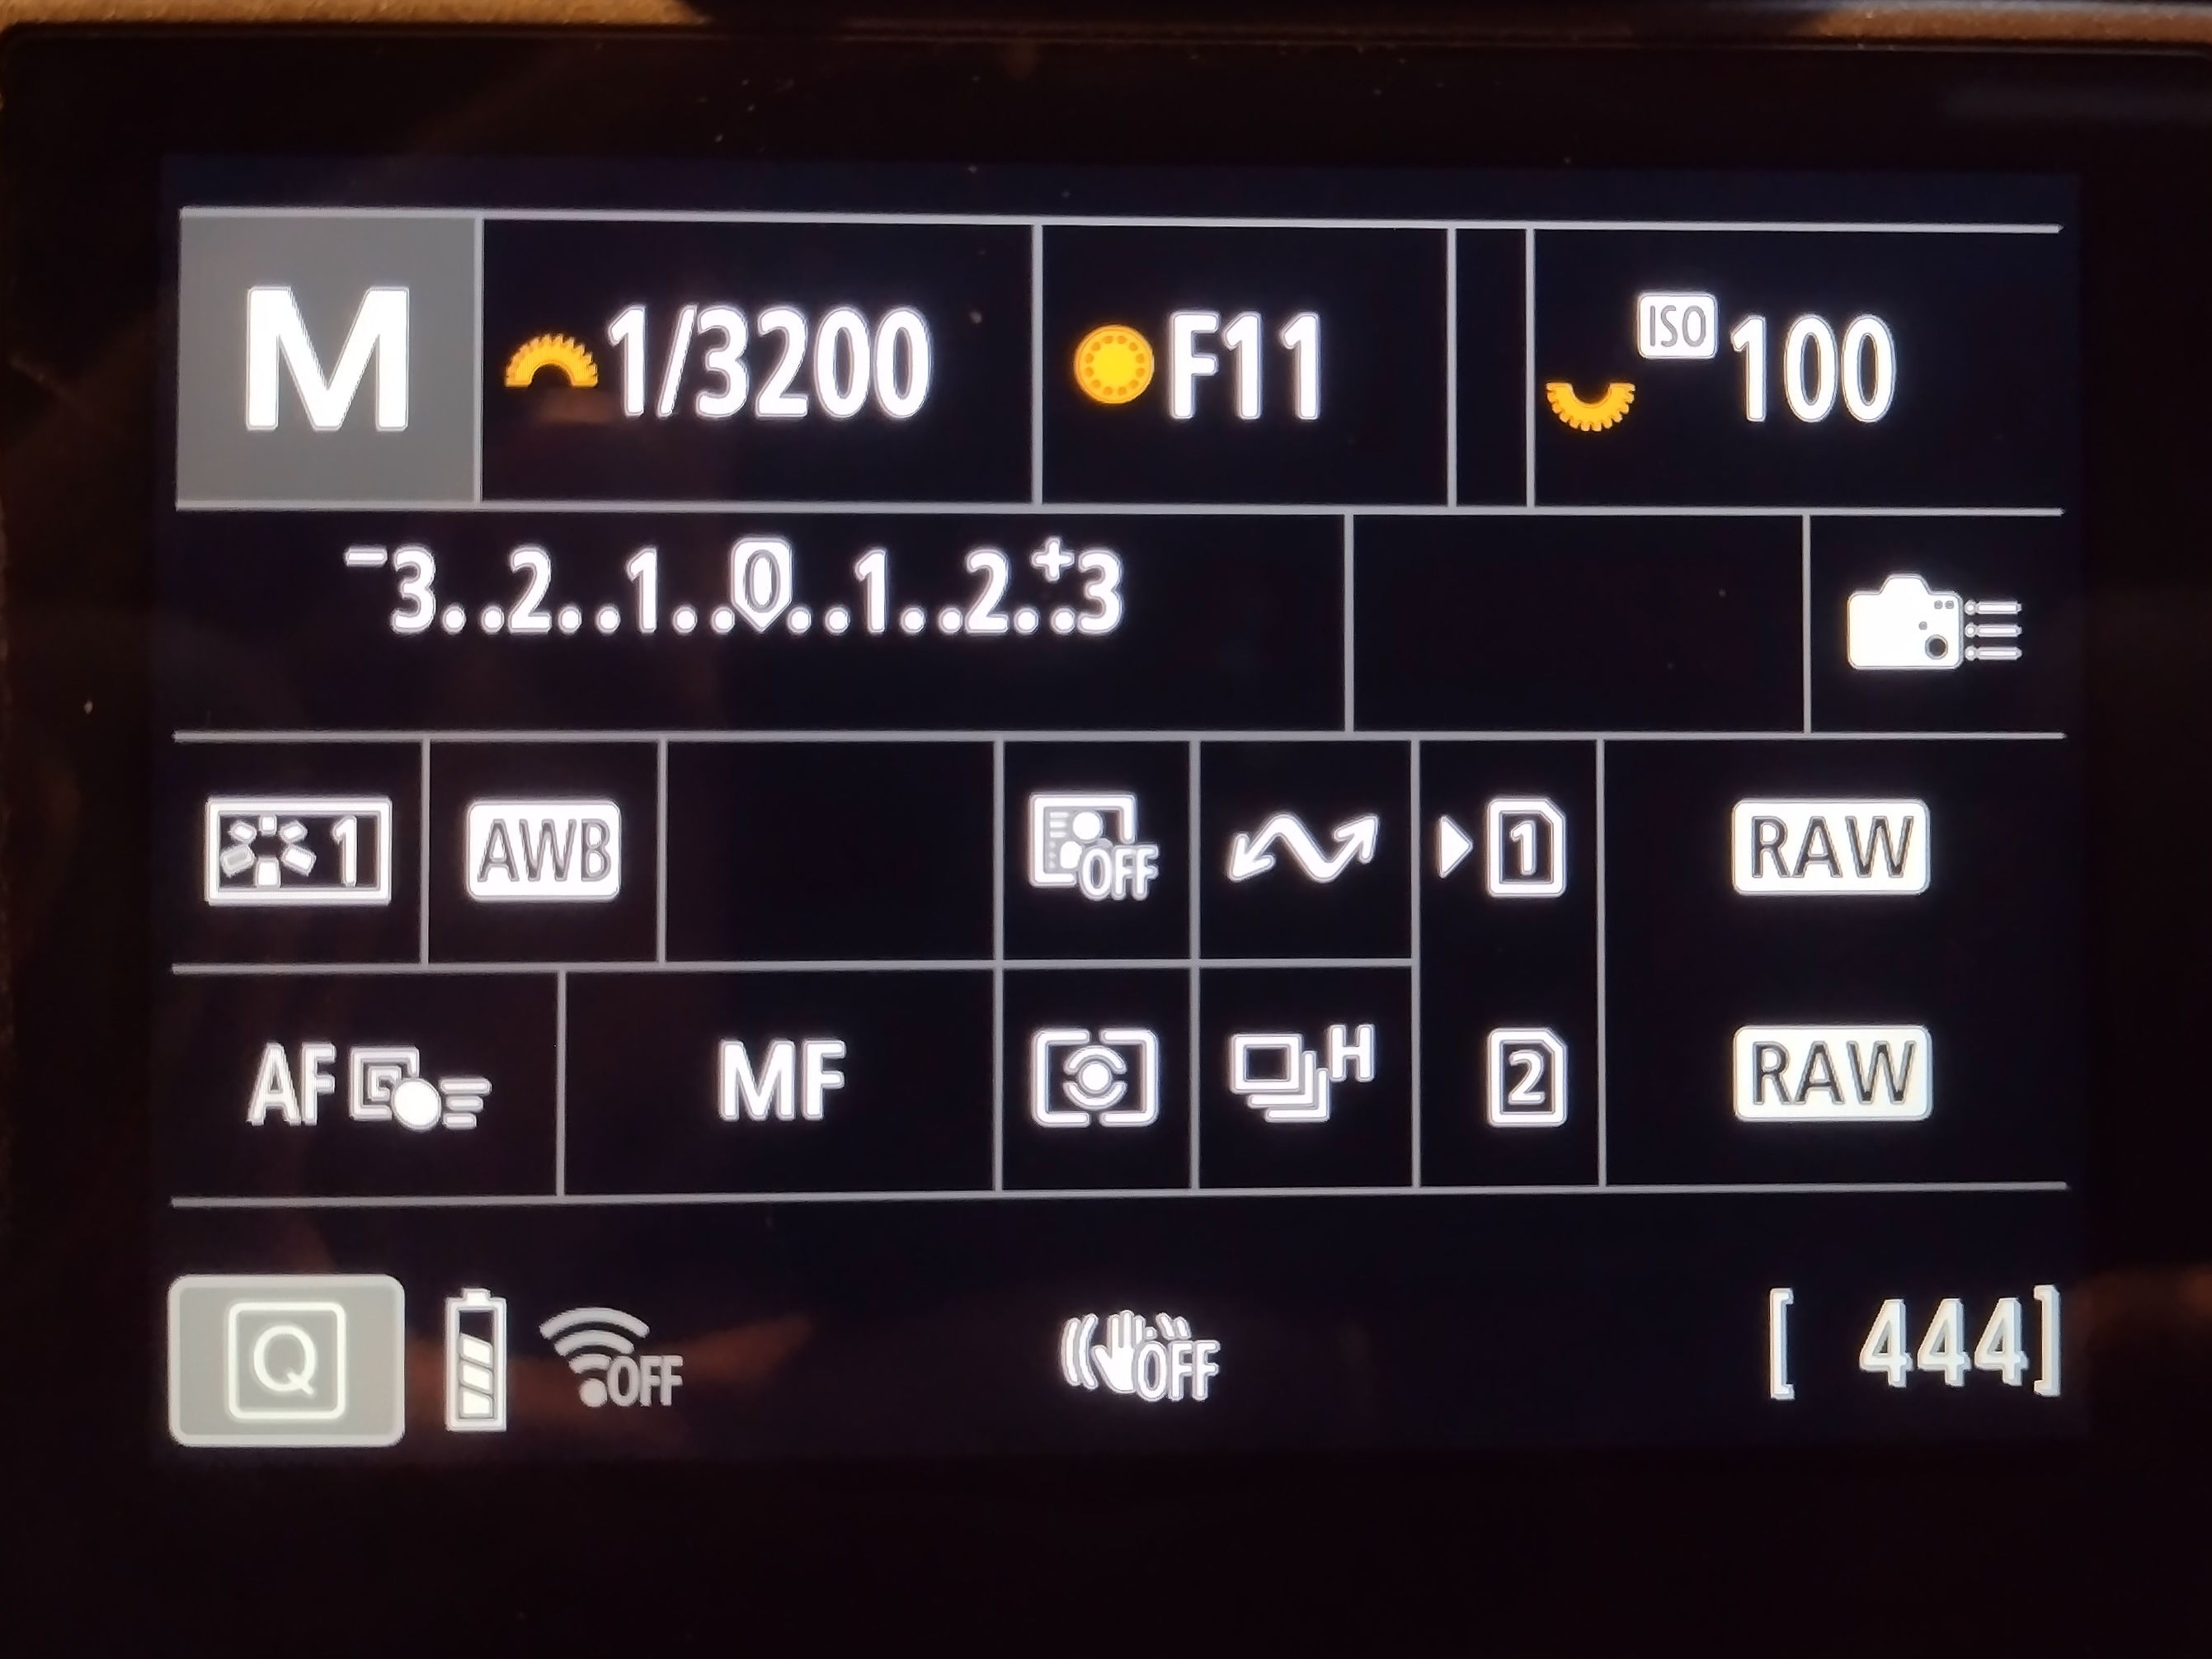 If you camera has three custom shooting modes, store this in custom mode 1. If you have fewer modes, then change your settings to these after your last partial phase image before you take off your filter.
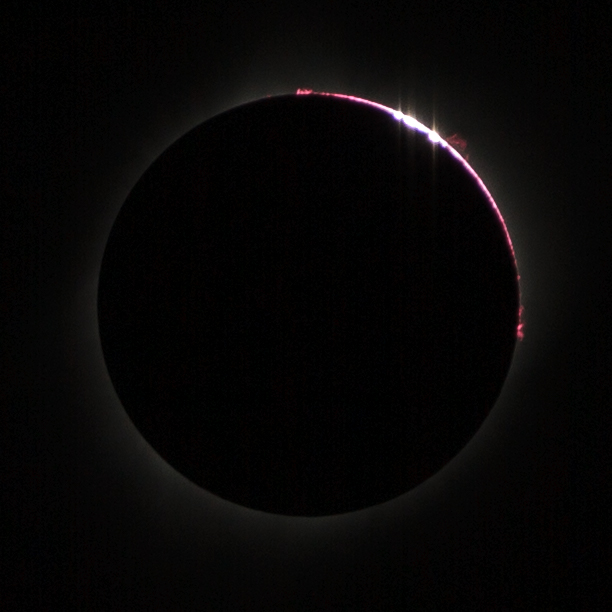
Custom Mode for Chromoshpere and Prominences
The chromosphere is the relatively thin red middle layer of the sun’s atmosphere. It’s always present but normally can’t be seen because the photosphere is so much brighter. It’s briefly visible just after C1, once the last bit of the bright photosphere is gone (the last of Baily’s Beads disappears). It is safe to view with your unprotected eye, so this is the first point where you look at the sun without your solar glasses.
Prominences are arcs of plasma extending from the solar limb. They are also reddish in color and are a bit dimmer than the chromosphere. They’ll also become visible after the photosphere passes fully behind the moon.
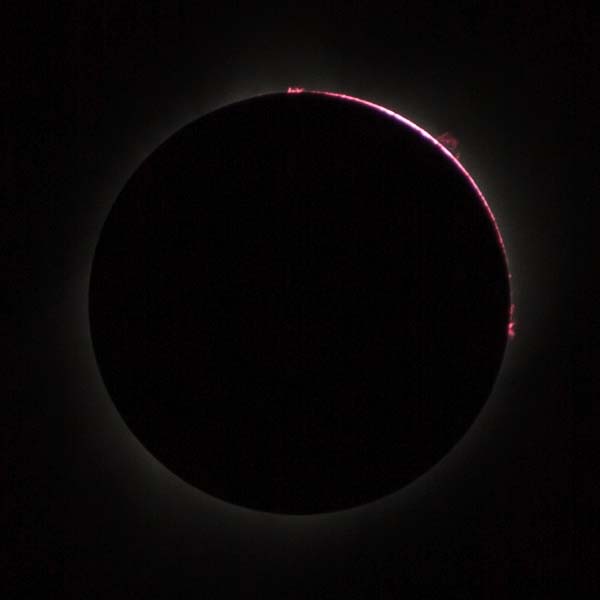
To shoot these, you’ll want a range of exposures values spanning from around EV 16 to EV 18. Auto exposure bracketing is useful for capturing a range of exposures quickly. Keep the camera in burst mode since the chromoshpere particularly is short-lived in its visibility before it too passes behind the moon’s limb. Here’s an example of settings you could use.
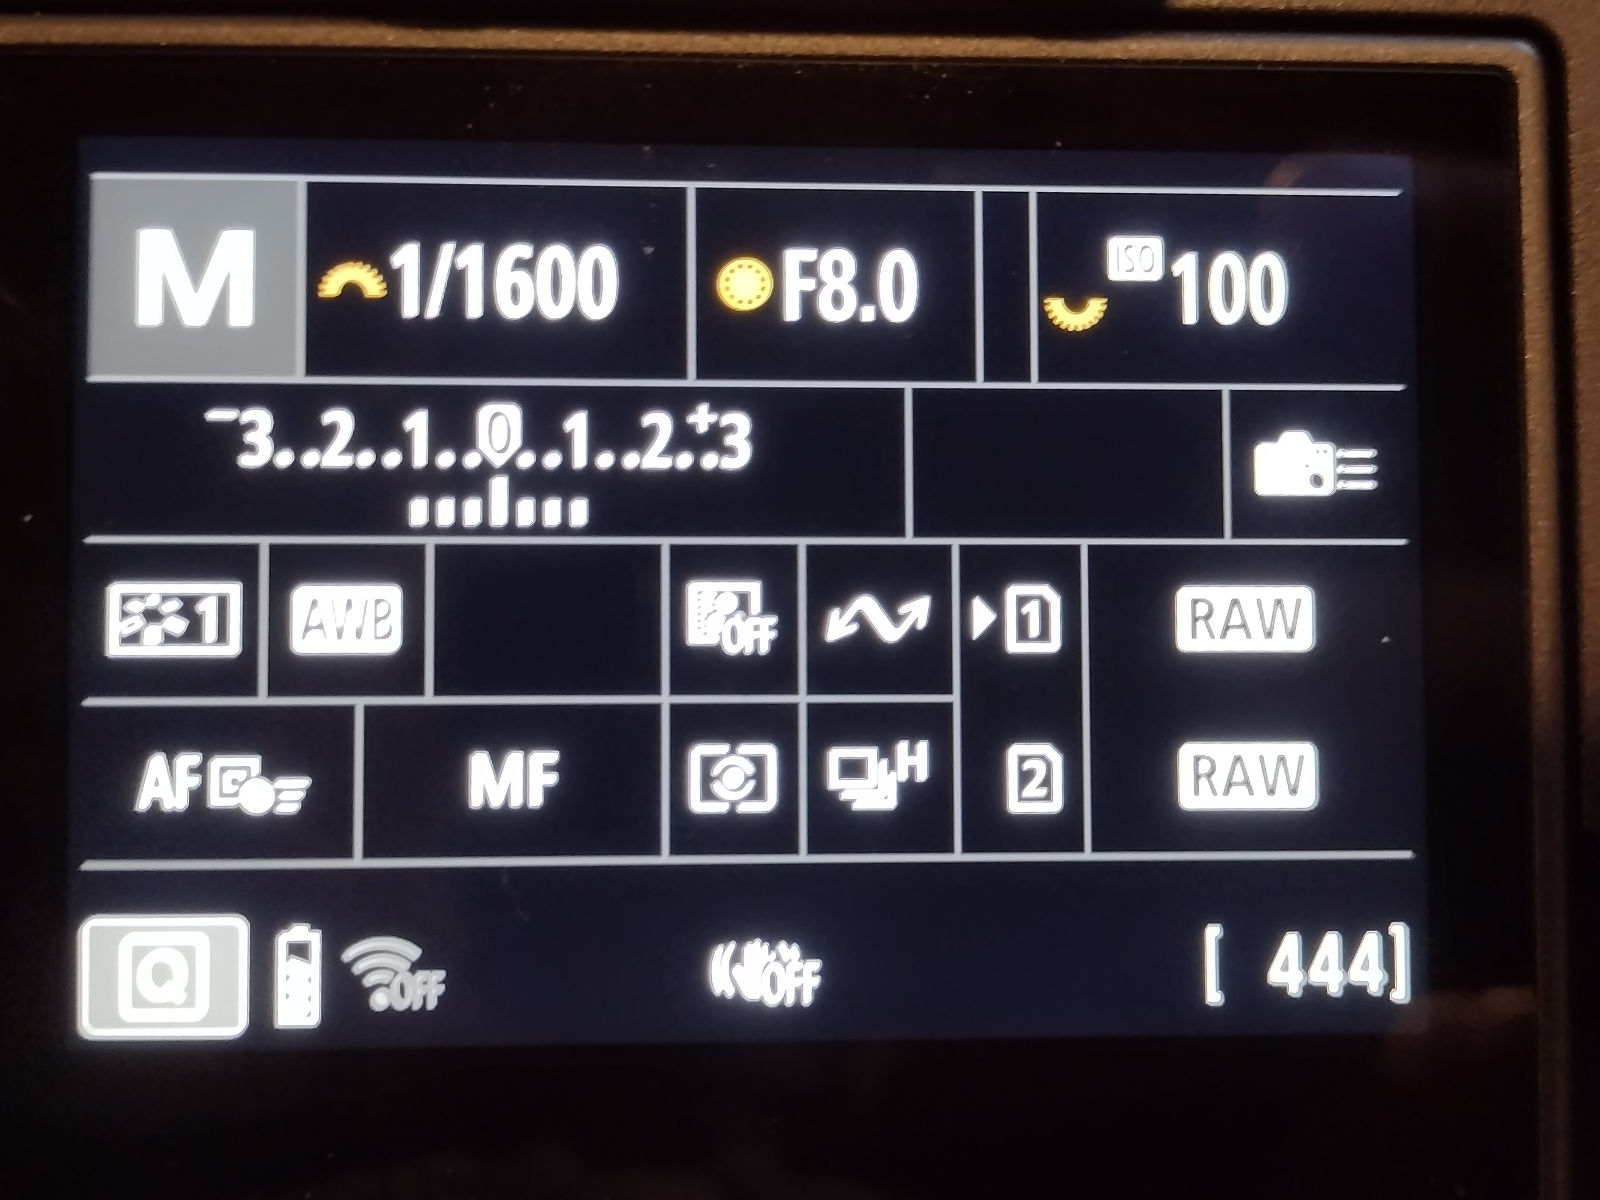
If you have at least two custom modes available, then set this as one of them (if you have 2 custom modes, set this as C1, and if you have three, set this as C2). If you only have one custom mode, then just plan to keep shooting bursts 10-15 seconds after Baily’s Beads disappear, bumping your exposure part of a stop brighter between short bursts as you work your way to EV 16.
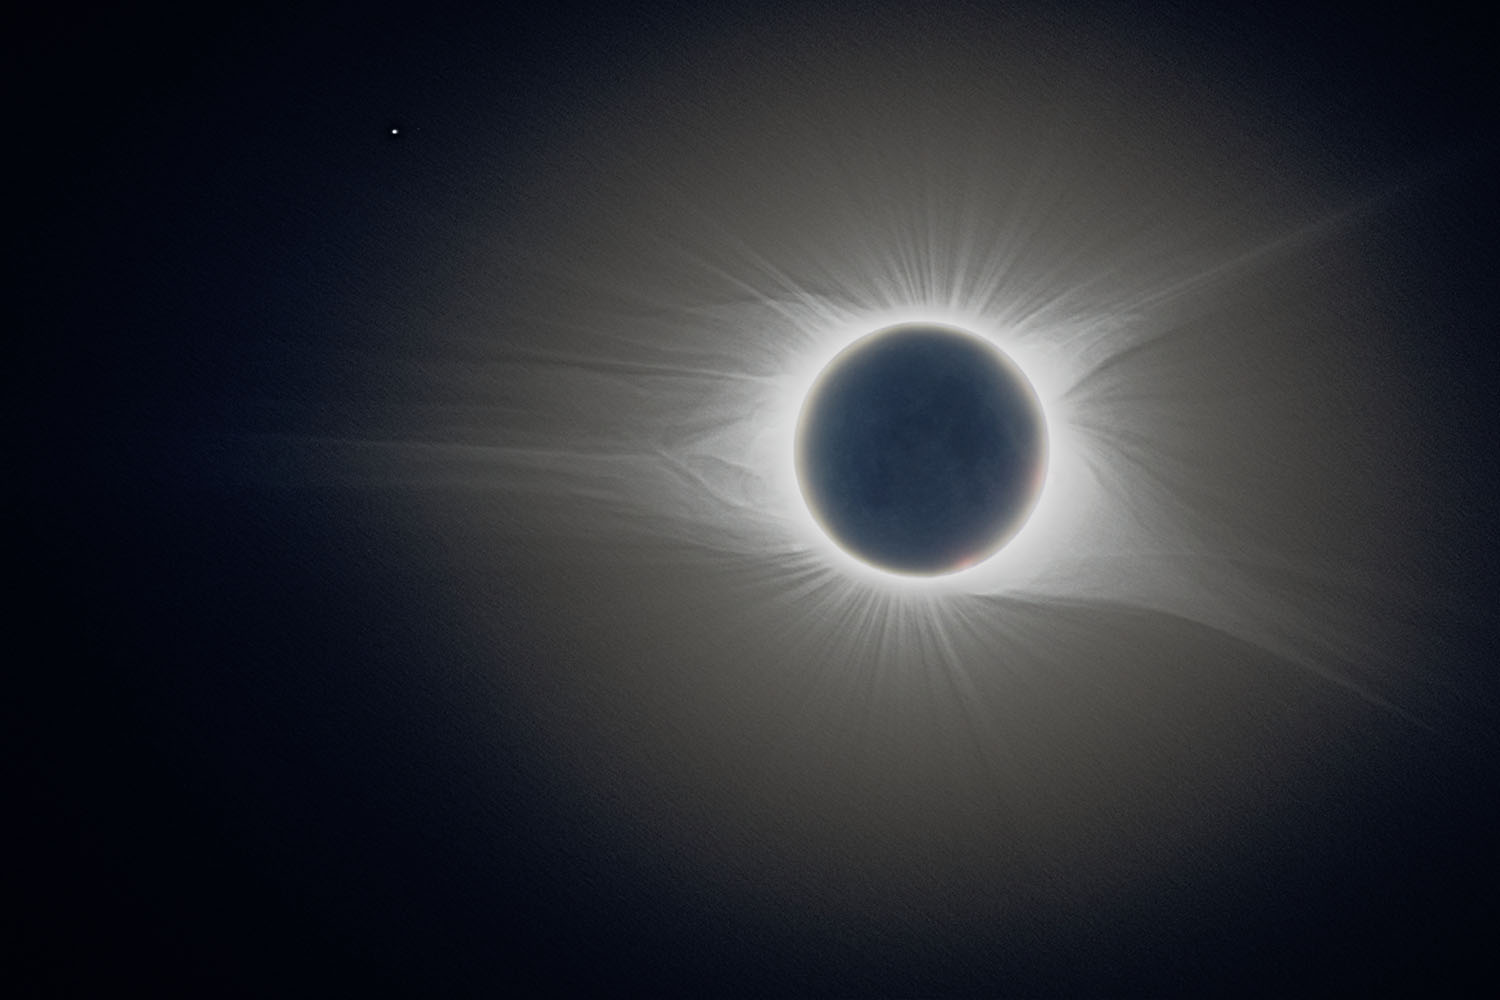
Custom Mode for the Corona
The corona is the sun’s outer atmosphere and is the headliner of totality. It’s breathtaking - I think it’s the most beautiful sight in the natural world. It’s also the most challenging part of an eclipse to photograph as its luminosity drops off significantly as it extends away from the sun. The following exposure is a composite taken from many different exposures to capture much of this detail.
The specific exposures used to create this composite varied significantly and can be seen in the following gallery.
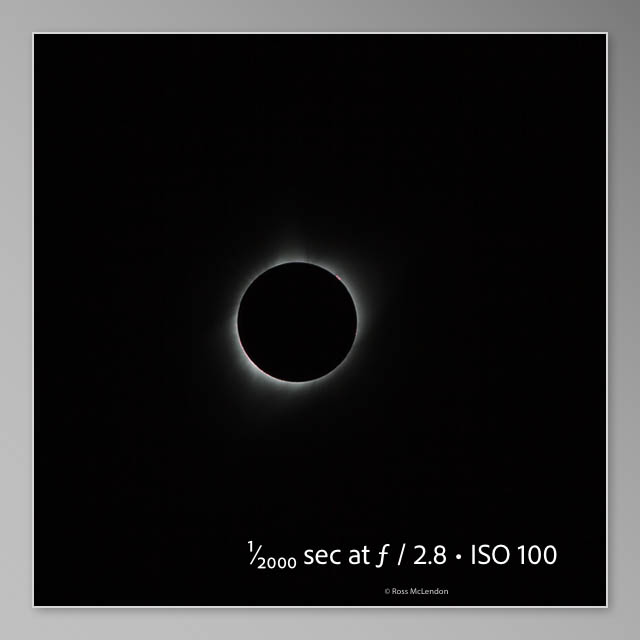

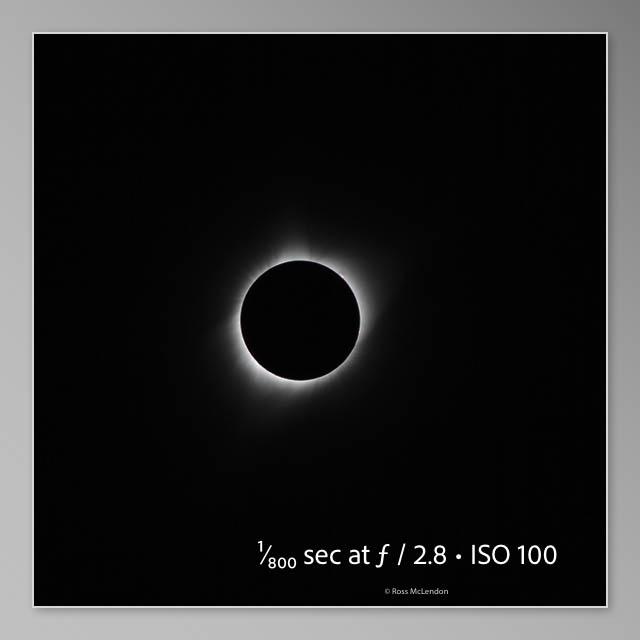
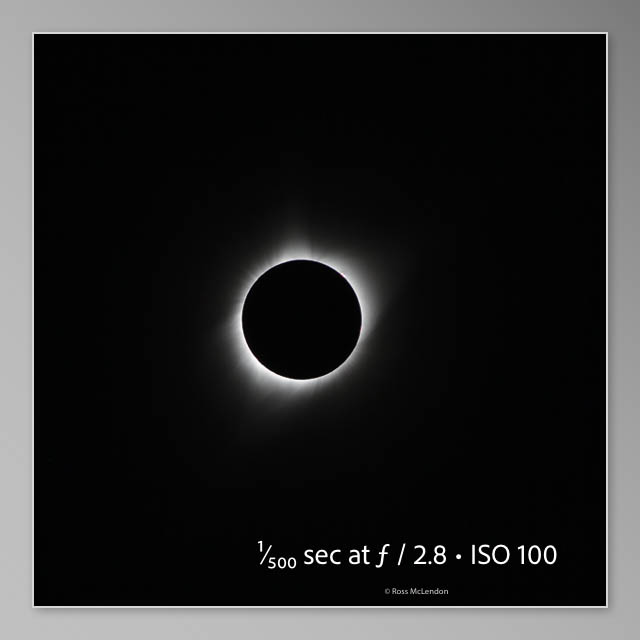
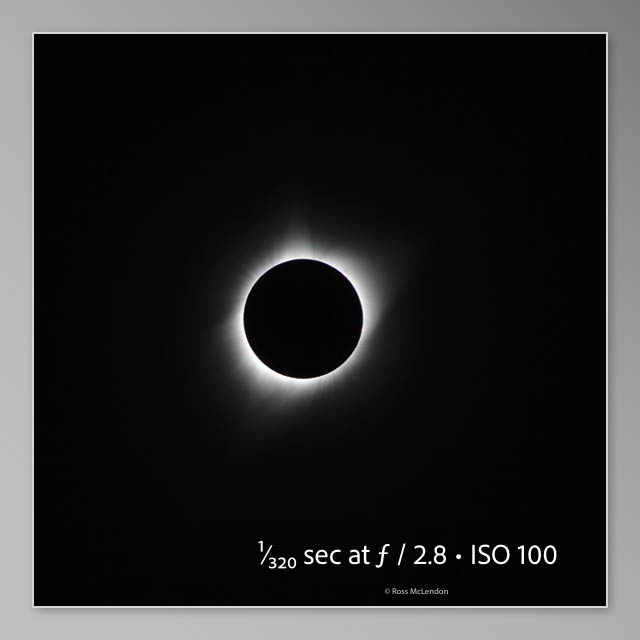
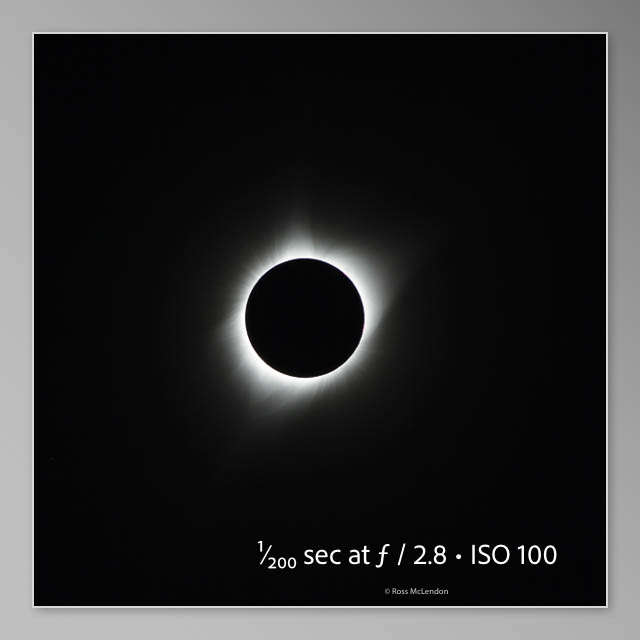


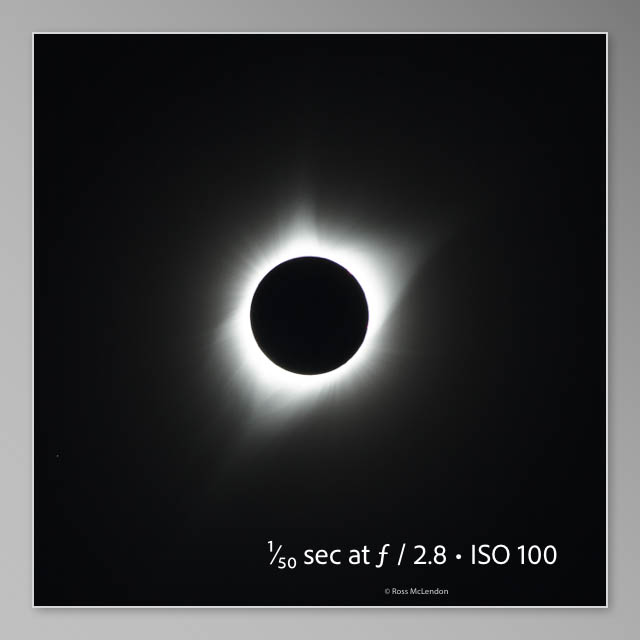
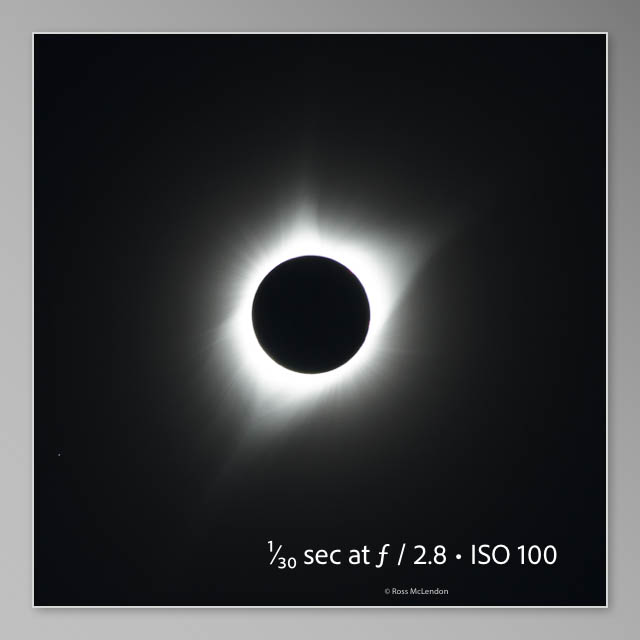
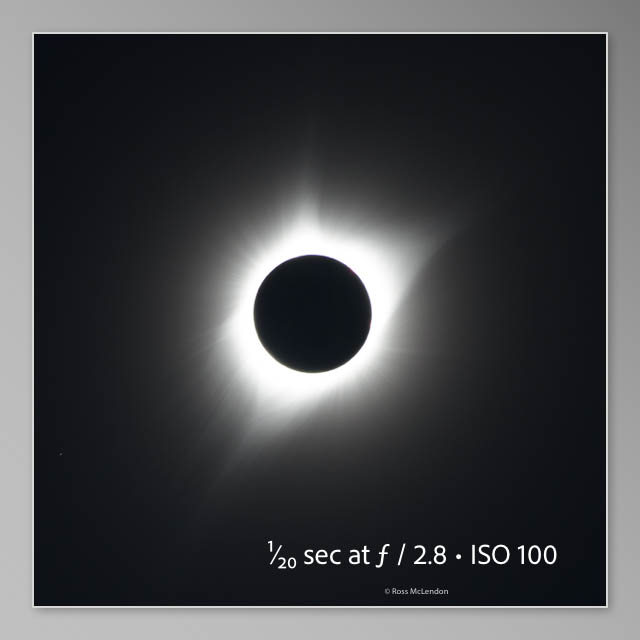
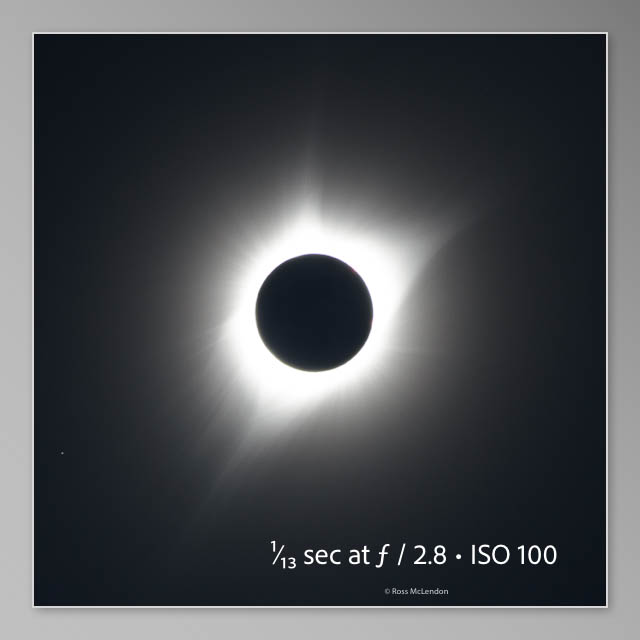
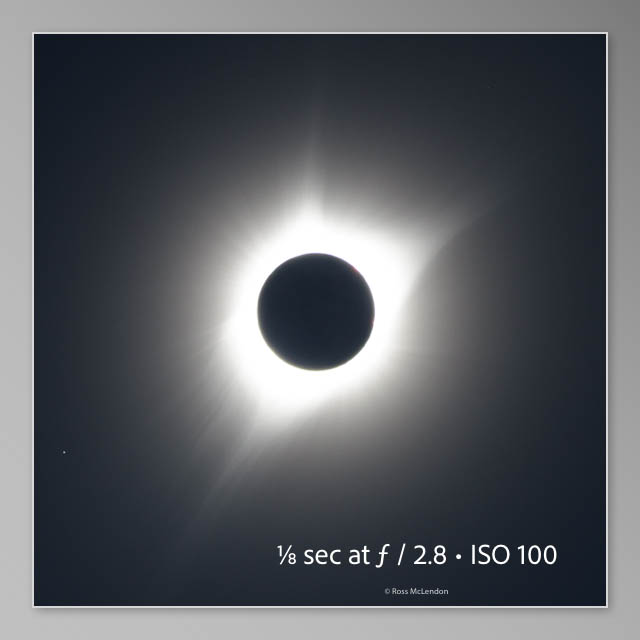
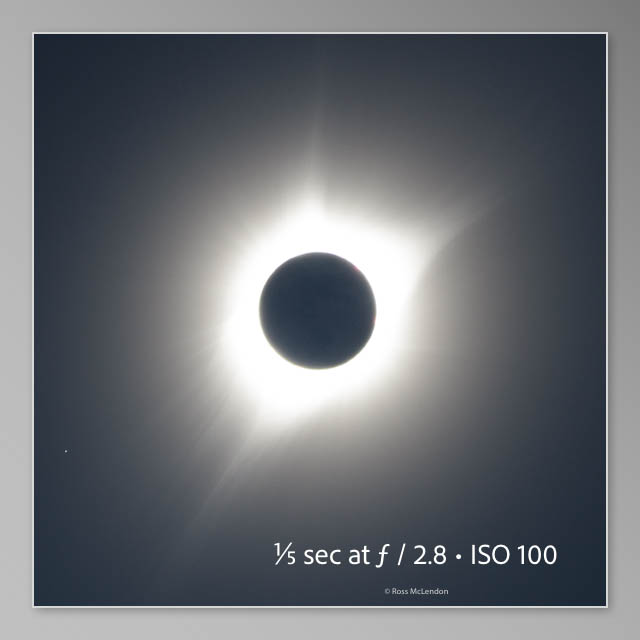
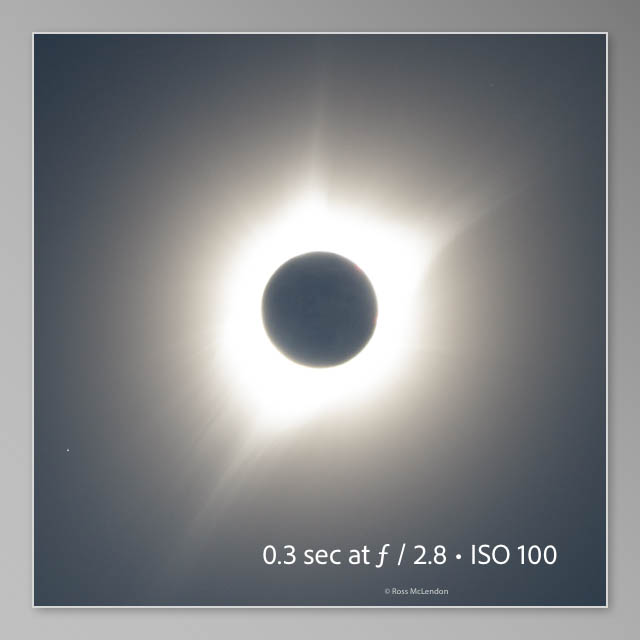
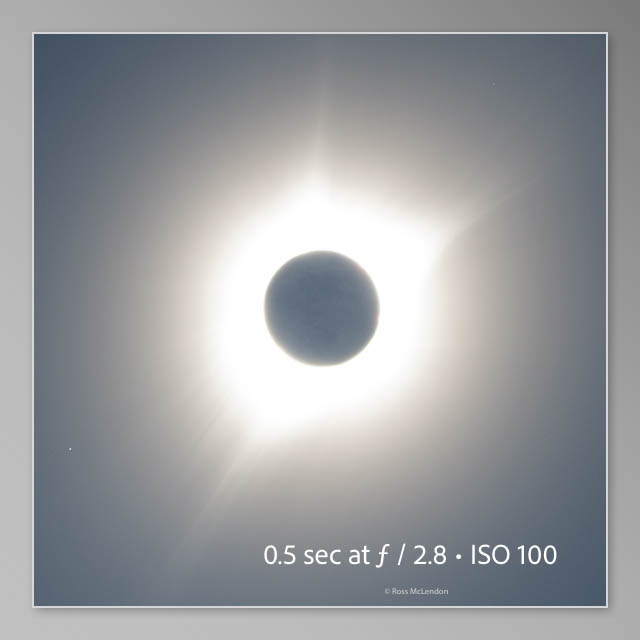
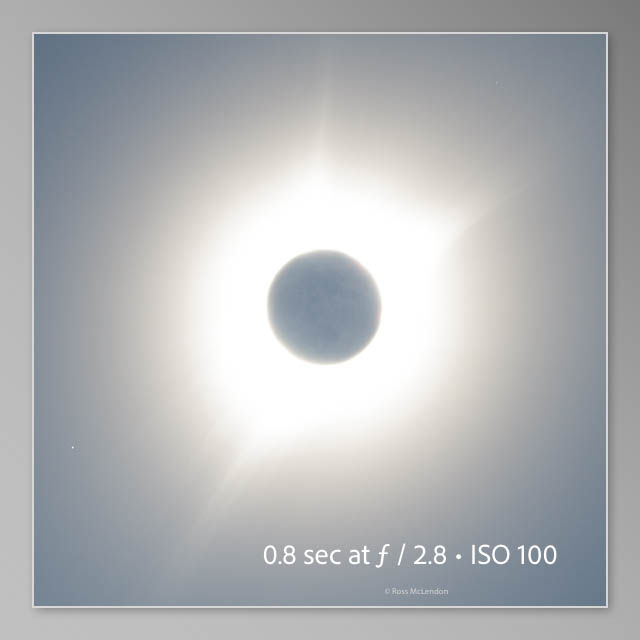
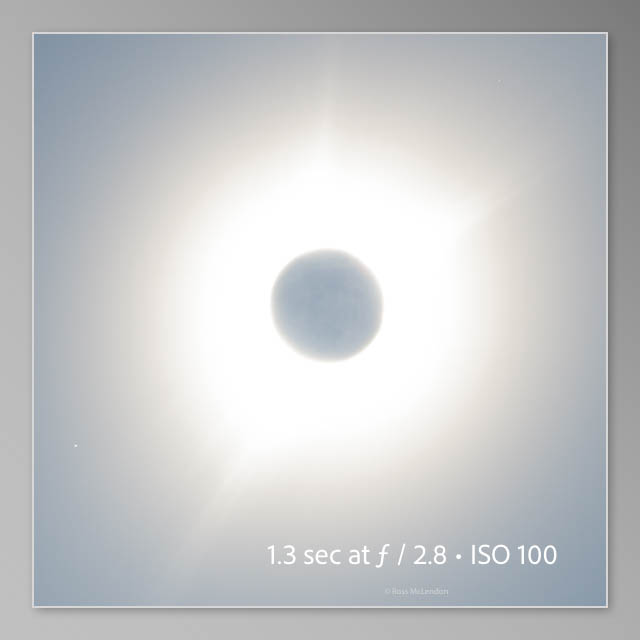
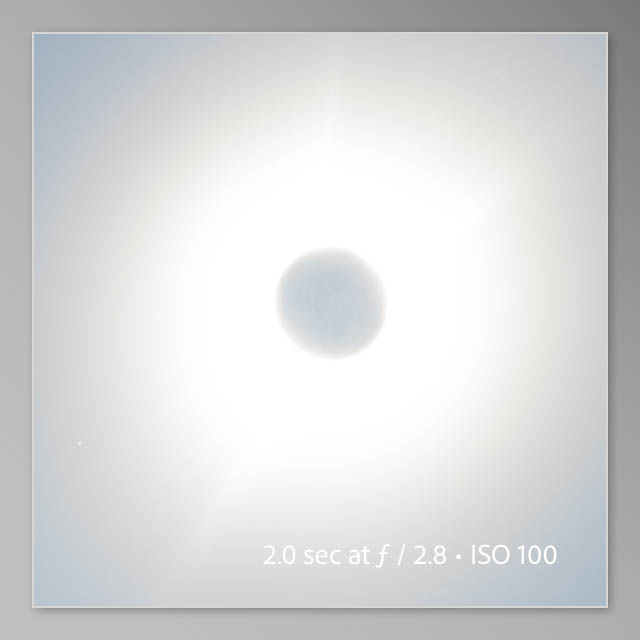
To capture this, you need to bracket your exposures from exposure values of EV 14 for the innermost corona to EV 4 or lower for the corona many solar radii from the solar disk. Dropping further to exposure values of EV 3 will clearly reveal features like earthshine on the moon (which isnt’ visible to the unaided eye but can be captured by cameras). How you want to go about capturing the corona is up to you, but this is a reasonable starting place for a custom mode for capturing the corona.
If your lens has a faster aperture, then you would want to shoot this with a lower f-number, adujusting your shutter speeds to compensate. Note that since a range from EV 14 to EV 4 is more than auto exposure bracketing will span on a Canon while maintaining one-stop bracket intervals, you won’t be able to capture all this range with a single bracket. Your camera also may be limited to shooting 3 or 5 exposures in a bracketed sequence, in which case you’ll need to shoot a sequence, change your central exposure, shoot another sequence, change exposure, etc. until you cover the range of exposures you want to capture. You might also just take a look at Xavier’s website or the gallery above and choose what’s most of interest to you in terms of how much of this exposure range you want to cover.
Regarding shutter speeds, note that as you get to longer shutter speeds the movement of the sun and corona in the frame will start to introduce motion blur. You also don’t want to be sitting too long waiting for exposures to finish. The last thing you want is to be messing with a camera stuck in a 30-second exposure that won’t even look good while you should be enjoying totality. As a result, depending on your aperture you may also want to consider bumping your ISO modestly to keep shutter speeds below 2 seconds or so. This is also where you’ll want that shutter release cable to avoid any blur from camera shake introduced by pressing the shutter button on the camera.
Additionally, I have the settings in this custom mode set to shoot a high-speed burst. You may also consider switching it to a 2-second timer, as this will cause the camera to fire an entire burst with a single press of the shutter (albiet after a 2-second delay) - or you could switch to single mode and press the shutter for every exposure. Again, it’s your choice.
This is the most important custom mode to have because it’s the most complicated collection of settings. If you only have one custom mode, set it as C1. If you have 2, set it as C2. If you have three, set it as C3.
No Custom Mode for Partial Phases
Partial phases don’t need a custom mode. This part unfolds slowly and you can adjust depending on your conditions, your filter, etc.
Shooting the Eclipse
This section covers what you’ll do to shoot the eclipse.
Days Before
Practice, practice, practice. Watch weather nervously to see what locations are most likely to have clear skies. Make a checklist of everything you need.
Day Before
Format your cards. Charge your batteries. Clean your sensor if that’s something you do yourself. Pack your gear using your checklist.
Arrival
Try to get to your shooting spot early. Celestial events wait for no one. Plan extra time for traffic. Try to find a spot where you’re not likely to have someone accidentally crash into your tripod.
Initial setup
For everything here, use manual focus that you dial in by punching in on liveview. Consider using a bit of gaffers tape to lock off your focus ring once you have it set (although you may end up fiddling with it a bit during the partial phaess). You should probably turn off IS if you’re on a tripod, especially if you have a remote shutter release. Set your camera to shoot RAW. I suggest using lossless RAW formats so you can get the most of out of your shadows in post-processing for the very broad dynamic range of the corona. Use manual mode. Start with a freshly formatted memory card.
Before C1
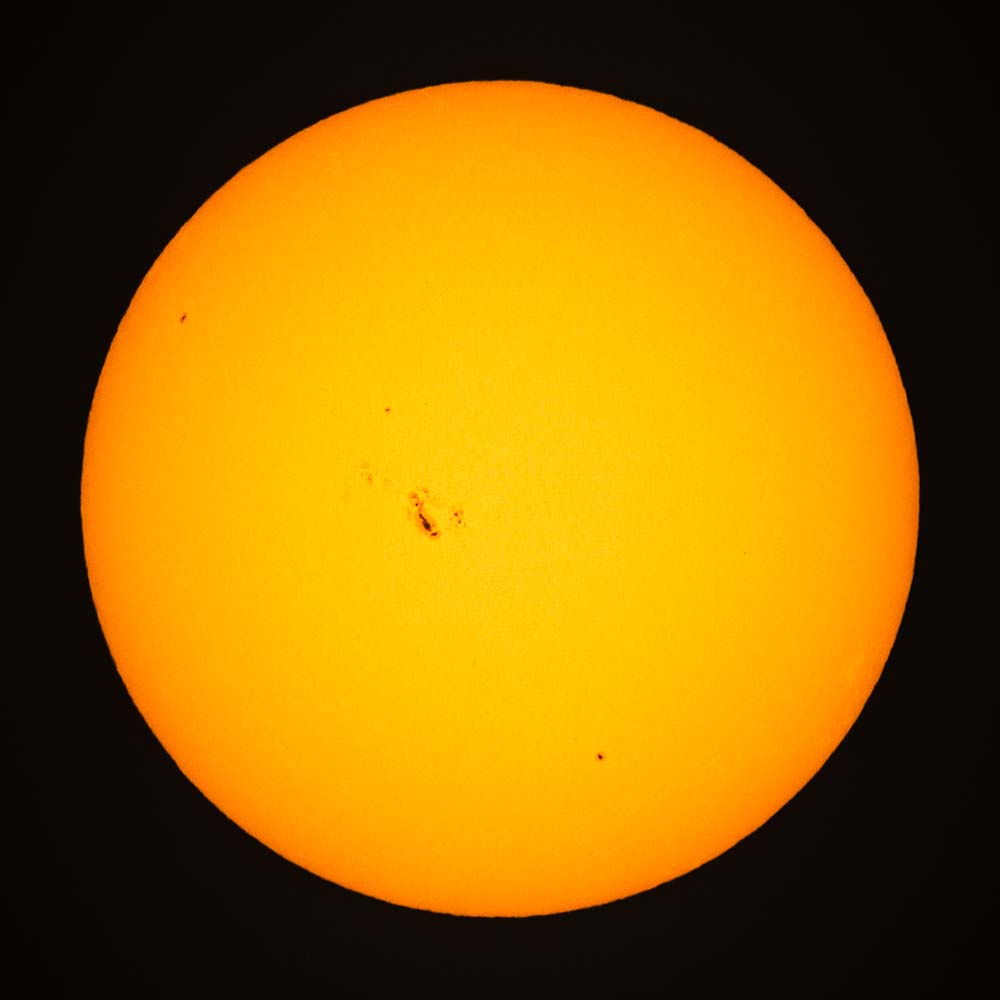
Consider getting at least one good shot of the full sun before C1. Optimally you’d get some practice exposures in before this.
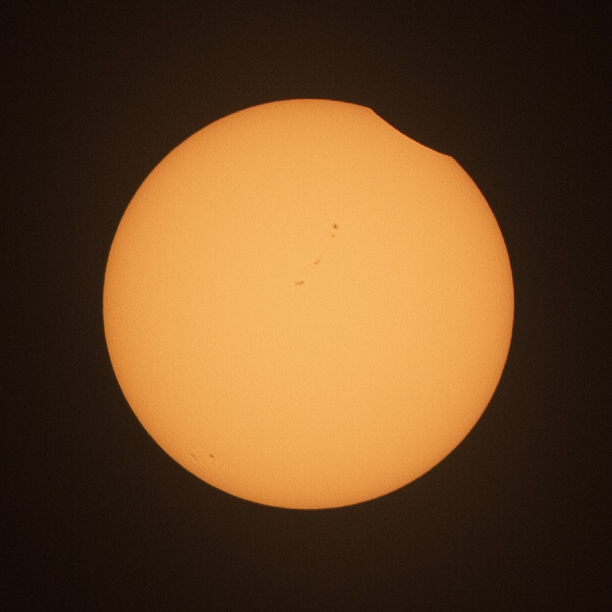
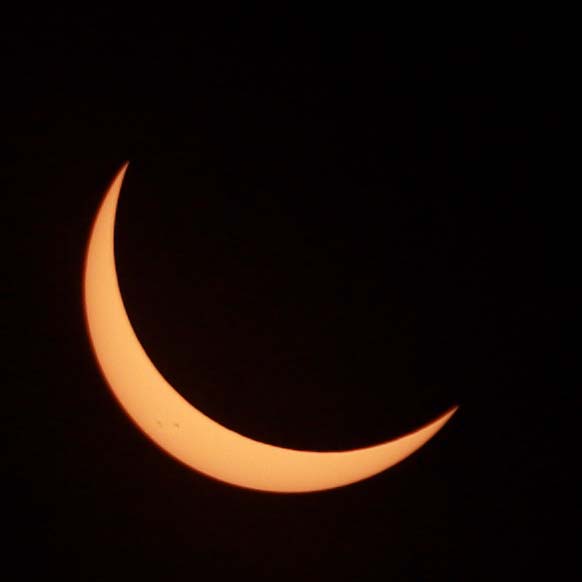
Partial Phases
Partial phases unfold more slowly, so you don’t really need a custom mode for this. Set your exposure so you’re not clipping your histogram, checking each color channel individually. Different filters have different strengths, so I can’t recommend a particular exposure. This is something you can practice ahead of time on a sunny day, or even spend a little time experimenting day-of. In terms of settings, you might want to aim for faster shutter speeds (like faster than 1/400s) using a higher ISO as atmospheric distortion (called “seeing” in the astronomy world) can reduce image sharpness. Faster shutter speed will help “freeze” the atmosphere. Dial in your focus on the edge of the sun or better yet on a sunspot if there is one.
Consider how many exposures you want to take of the partial phases. This can be a good time to pull out an intervalometer, or use some sort of timer on your phone to remind yourself to hit the shutter every few minutes. You’ll be continually re-framing during this part.
Note that the edge of the sun will be dimmer than the center (called limb darkening). As the sun turns into a crescent, you may consider increasing your exposure brightness a little.
5 Minutes Before Totality
Check your battery and put in a fresh one if you have any concerns that it may not last through totality. Double-check your focus. Prepare yourself mentally. Take in the surroundings as the light will have started looking a bit odd. If you’re planning a lens change, I’d probably do it now to get things dialed back in before the excitement.
2 Minutes Before Totality
Things are about to get very exciting. After shooting your last partial phase image about a minute before C1, switch your camera to your custom mode for Baily’s Beads or put the settings for that phase in manually. Frame the sun so that it’ll pass through the center at maximum eclipse (the sun will move about one solar diameter ever 2 minutes, you should have a feel for how quikcly the sun moves across your frame at this point). Get ready to remove your solar filter (and have a place ready to set it down).
Totality
This is the exciting and hard part of photographing an eclipse. Above all else, don’t forget to take it in with your own two eyes. If everything falls apart photography-wise, just step away from your camera and enjoy the moment.
Remove the Filter
20-30 seconds before C2, remove the filter and set it in the place where you know where it is. DON’T FORGET TO REMOVE THE FILTER! Your brain is likely to break as you behold what’s happening in the sky and around you and consider in awe the movement of celestial bodies spanning millions of miles to make this all happen, so do everything you can to help remind yourself to take the filter off. If you forget, you’ll have no images of the best part of the eclipse and you’ll waste time wondering why your camera isn’t working.
Baily’s Beads
Once your filter is off, start your Baily’s Beads burst. You should know how long you can shoot whatever burst rate you’ve got set up (optimally set a burst speed your camera can sustain indefinitely) and time your burst so that you can sustain it up until the moment of C2, when the last bead disappears. You are now officially in totality. People around you will be cheering. You may be cheering.
Chromoshpere and Prominences
Switch to your chomosphere and prominences custom mode and start shooting. If you don’t have a custom mode for this, iterate on bumping up the exposure 2/3 stop and firing a burst until you’re a few stops brighter than you were for Baily’s Beads. Once you’ve done this or run through a few bracketed sequences, if you have a pair of binoculars this is an interesting time to take a look.
Corona
Now switch your mode dial your custom mode for the corona. Shoot through the bracketed exposure sequences you’ve planned and practiced. Once you’re done, step back from your camera and enjoy totality with your own two eyes, marveling at what’s likley the most incredible sight you’ve ever seen. Be listening to the timing app for “Maximum Eclipse” When you hear this, totality is half over. If you’re still messing with photography, this is probably a good final point to cut yourself off.
Approaching C3
If you want, you can switch back to the Chromosphere and Prominences settings and shoot those on the flipside of totatlity in the ~20 seconds leading up to C3.
After C3
Baily’s beads happen again after C3, so just before C3 you can switch to your Baily’s Beads settings and shoot another burst of those. Remember not to look at Baily’s Beads with your unprotected eyes. After shooting the burst for the Baily’s Beads after C3 MAKE SURE TO PUT YOUR FILTER BACK ON* (within about 30 seconds of the first bead appearing). If you forget, don’t worry - the smoke coming from your camera will eventually remind you.
Partial Phases (Post-Totality)
Now that totality is done, you can shoot the partial phases again just as you did before. Again, make sure you keep the filter on your camera.
Fin
Load you stuff up. Get in your car. Drive home (which will take much longer than normal). Fall into the rabbit hole of eclipse imagery post-processing.
Closing Remarks
Practice, practice, practice. Test your settings focused on something so you can check for things like shutter shock that could introduce blurriness. Be aware that if you’re dealing with thin clouds or other factors reducing sky transparency, all these exposure values will be a bit on the dark side (maybe just bump your ISO if that ends up being the case). Have a plan, write it down, rehearse it as much as you can, and you’ll come away with something.
Note that there’s a phase/exposure commonly referenced called the “Diamond Ring” which is a brighter exposure of the last bit of photosphere around the same time as Baily’s Beads shot without filter and exposed around EV 12.5, bright enough to reveal a small bit of inner corona around the moon. I haven’t included the Diamond Ring in this guide as I think it makes things a bit too complicated to add a whole other exposure regime in the seconds before C2 and after C3. I just mention it here in case you’re feeling especially confident and I don’t want to be called out for omitting it.
Enjoy the experience. Think about why something so unlikely as our total solar eclipses are also so beautiful. And above all else, whatever you do, make sure that you